The biggest issue for anyone who has an iPad and uses it for music is turning the pages. You can buy a myriad of them on Amazon. But, that is yet another thing to take to a gig. And what if you already have an effects pedal happening? It’s another thing on the floor, that you have to figure out where to put it…..so can’t you put it on the pedal board?
Pedalboard 2.0 tried to do this. But it was huge. Took up a LOT of space, even on a bigger pedal board. And I don’t like lugging around the bigger pedal board.

So, why not make one? There are a couple of DYI projects on the web to make a bluetooth page turner, one of them being this one on the instructables. However, they no longer sell the keypart of this project, the Adafruit EZ-Key. Spending some time on Google I found this great tutorial by Anthony Warren which used readily available parts. We parted ways on how to do the code though, which I’ll explain a little later. Let’s get to the parts.
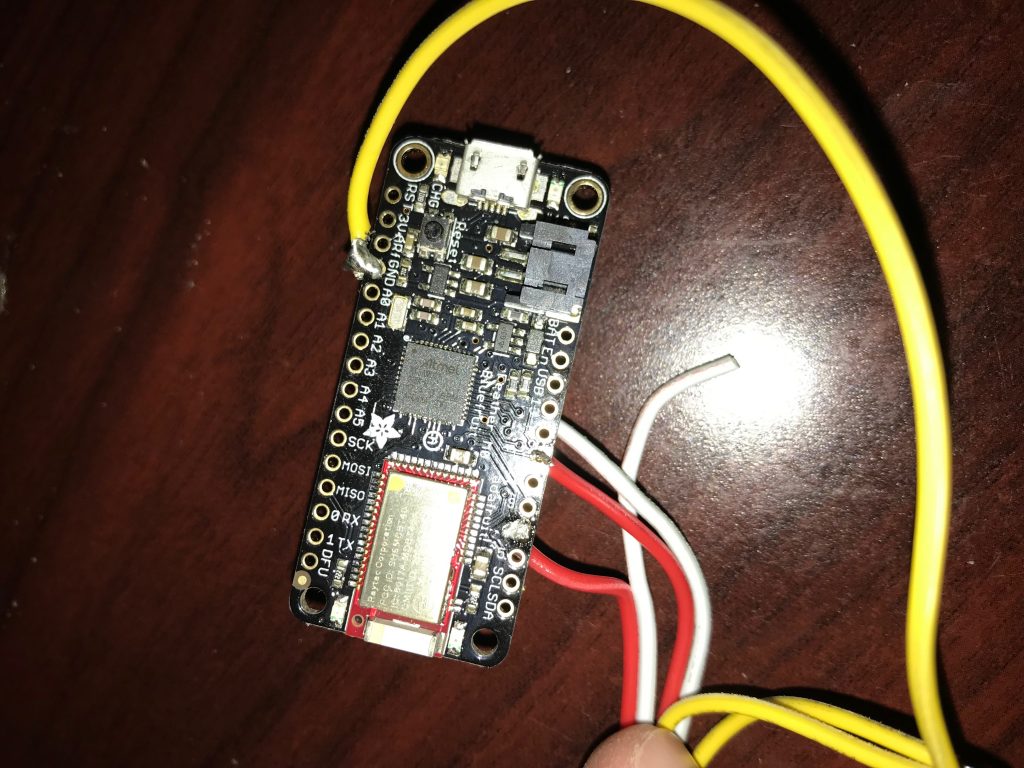
The first part is an Adafruit Feather M0 Bluefruit LE. This is the brains of the whole thing. It is powered by either a battery pack or USB. The power supply on my pedal board has USB, so power is not an issue.
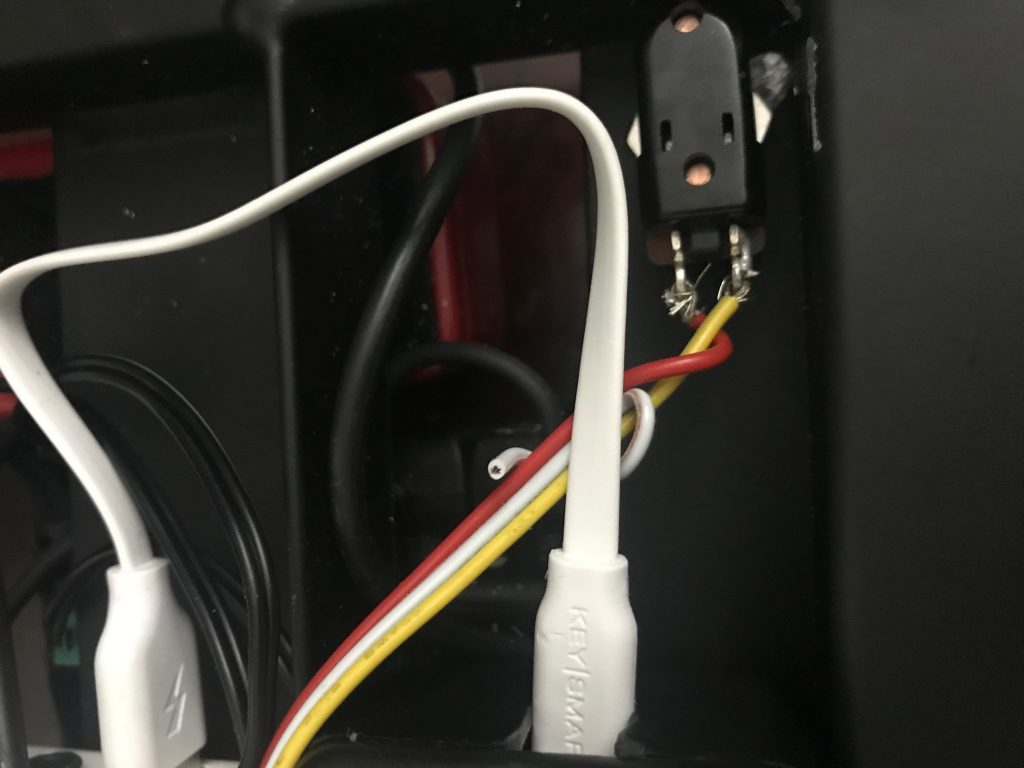
Next parts were the Etopars Guitar Effects Pedal Box Momentary SPST Button Stomp Foot Switches. These are in an OPEN state until you press them, and then it completes the circuit.
Wiring was pretty straight forward. Both switches share a common ground.
something.
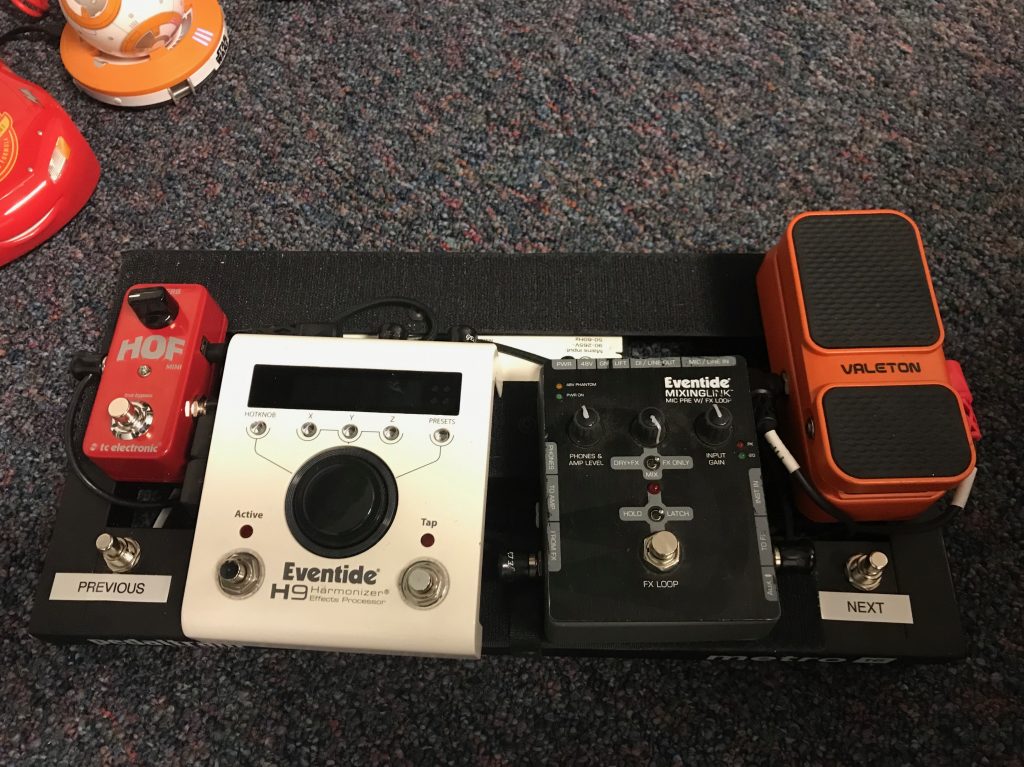
The whole thing was really easy to do and now I have an effects pedal with a page turner on it.
Now, the code. I chose to do the route of making the Bluefruit a keyboard replacement rather than what Mr. Warren did (where he did it via Midi). The advantage is that it is easier to pair, and it was easier to get ForScore to work. Plus I had a time deadline on it, and wanted it working before a gig. I MIGHT revisit this and tweak it some more (perhaps using Midi). Right now though, it works really well. I think I might tweak it so when you stomp BOTH Switches, it drops the bluetooth connection for a set period of time or until you stomp BOTH again. This would allow me then to use the iPad’s keyboard for a period of time. Anyhow, the code is based off the example in the Arduino IDE.
/*********************************************************************
 This is an example for our nRF51822 based Bluefruit LE modules

 Pick one up today in the adafruit shop!

 Adafruit invests time and resources providing this open source code,
 please support Adafruit and open-source hardware by purchasing
 products from Adafruit!

 MIT license, check LICENSE for more information
 All text above, and the splash screen below must be included in
 any redistribution
*********************************************************************/

/*
  This example shows how to send HID (keyboard/mouse/etc) data via BLE
  Note that not all devices support BLE keyboard! BLE Keyboard != Bluetooth Keyboard

  This pageturning code is based on the above Example. Uses ForScore on an iPad. Changed the next page keymapping to N and the previous page to P

*/

#include <Arduino.h>
#include <Wire.h>
#include <SPI.h>
//#include <Keyboard.h>
#include "Adafruit_BLE.h"
#include "Adafruit_BluefruitLE_SPI.h"
#include "Adafruit_BluefruitLE_UART.h"

#include "BluefruitConfig.h"

#if SOFTWARE_SERIAL_AVAILABLE
  #include <SoftwareSerial.h>
#endif


/*=========================================================================
    APPLICATION SETTINGS

? ? FACTORYRESET_ENABLE?   ?  Perform a factory reset when running this sketch
? ?
? ?                           Enabling this will put your Bluefruit LE module
                              in a 'known good' state and clear any config
                              data set in previous sketches or projects, so
? ?                           running this at least once is a good idea.
? ?
? ?                           When deploying your project, however, you will
                              want to disable factory reset by setting this
                              value to 0.? If you are making changes to your
? ?                           Bluefruit LE device via AT commands, and those
                              changes aren't persisting across resets, this
                              is the reason why.? Factory reset will erase
                              the non-volatile memory where config data is
                              stored, setting it back to factory default
                              values.
? ? ? ?
? ?                           Some sketches that require you to bond to a
                              central device (HID mouse, keyboard, etc.)
                              won't work at all with this feature enabled
                              since the factory reset will clear all of the
                              bonding data stored on the chip, meaning the
                              central device won't be able to reconnect.
    MINIMUM_FIRMWARE_VERSION  Minimum firmware version to have some new features
    -----------------------------------------------------------------------*/
    #define FACTORYRESET_ENABLE         0
    #define MINIMUM_FIRMWARE_VERSION    "0.6.6"
/*=========================================================================*/


// Create the bluefruit object, either software serial...uncomment these lines
/*
SoftwareSerial bluefruitSS = SoftwareSerial(BLUEFRUIT_SWUART_TXD_PIN, BLUEFRUIT_SWUART_RXD_PIN);

Adafruit_BluefruitLE_UART ble(bluefruitSS, BLUEFRUIT_UART_MODE_PIN,
                      BLUEFRUIT_UART_CTS_PIN, BLUEFRUIT_UART_RTS_PIN);
*/

/* ...or hardware serial, which does not need the RTS/CTS pins. Uncomment this line */
// Adafruit_BluefruitLE_UART ble(BLUEFRUIT_HWSERIAL_NAME, BLUEFRUIT_UART_MODE_PIN);

/* ...hardware SPI, using SCK/MOSI/MISO hardware SPI pins and then user selected CS/IRQ/RST */
Adafruit_BluefruitLE_SPI ble(BLUEFRUIT_SPI_CS, BLUEFRUIT_SPI_IRQ, BLUEFRUIT_SPI_RST);

/* ...software SPI, using SCK/MOSI/MISO user-defined SPI pins and then user selected CS/IRQ/RST */
//Adafruit_BluefruitLE_SPI ble(BLUEFRUIT_SPI_SCK, BLUEFRUIT_SPI_MISO,
//                             BLUEFRUIT_SPI_MOSI, BLUEFRUIT_SPI_CS,
//                             BLUEFRUIT_SPI_IRQ, BLUEFRUIT_SPI_RST);

// A small helper
void error(const __FlashStringHelper*err) {
  Serial.println(err);
  while (1);
}


/**************************************************************************/
/*!
    @brief  Sets up the HW an the BLE module (this function is called
            automatically on startup)
*/
/**************************************************************************/
void setup(void)
{
//  while (!Serial);  // required for Flora & Micro
  delay(500);

  if ( !ble.begin(VERBOSE_MODE) )
  {
    error(F("Couldn't find Bluefruit, make sure it's in CoMmanD mode & check wiring?"));
  }
  /* Disable command echo from Bluefruit */
  ble.echo(false);

//  Serial.println("Requesting Bluefruit info:");
  /* Print Bluefruit information */
  ble.info();

  /* Change the device name to make it easier to find */
 // Serial.println(F("Setting device name to 'Bluefruit Keyboard': "));
  if (! ble.sendCommandCheckOK(F( "AT+GAPDEVNAME=Bluefruit PageTurner" )) ) {
    error(F("Could not set device name?"));
  }

  /* Enable HID Service */
//  Serial.println(F("Enable HID Service (including Keyboard): "));
  if ( ble.isVersionAtLeast(MINIMUM_FIRMWARE_VERSION) )
  {
    if ( !ble.sendCommandCheckOK(F( "AT+BleHIDEn=On" ))) {
      error(F("Could not enable Keyboard"));
    }
  }else
  {
    if (! ble.sendCommandCheckOK(F( "AT+BleKeyboardEn=On"  ))) {
      error(F("Could not enable Keyboard"));
    }
  }

  /* Add or remove service requires a reset */
  Serial.println(F("Performing a SW reset (service changes require a reset): "));
  if (! ble.reset() ) {
    error(F("Couldn't reset??"));
  }

  // Set up Pins on the board to be able to handle the SPST switches (Guitar type switches)
  pinMode(6, INPUT_PULLUP);
  pinMode(11, INPUT_PULLUP);
  // Give some visual feedback things are working on the board
  pinMode(LED_BUILTIN, OUTPUT);
  digitalWrite(LED_BUILTIN, LOW);    // turn the LED off by making the voltage LOW

}

/**************************************************************************/
/*!
    @brief  Constantly poll for new command or response data
*/
/**************************************************************************/

void loop(void)
{
// interval for each scanning ~ 500ms (non blocking)
//  ble.update(500);
  if ((digitalRead(6) == HIGH) && (digitalRead(11) == HIGH)){
    // This is here as a little visual indicator that this are working ok
    digitalWrite(LED_BUILTIN, LOW);    // turn the LED off by making the voltage LOW
  }
  if (digitalRead(6) == LOW){
    ble.print("AT+BleKeyboard=");
    ble.println("P");
    digitalWrite(LED_BUILTIN, HIGH);    // turn the LED ON by making the voltage HIGH
    if( ble.waitForOK() ){
      Serial.println( F("OK!") );
    }
    else{
    Serial.println( F("FAILED!") );
    }
  }
  if (digitalRead(11) == LOW){
    ble.print("AT+BleKeyboard=");
    ble.println("N");
    digitalWrite(LED_BUILTIN, HIGH);    // turn the LED ON by making the voltage HIGH
    if( ble.waitForOK() ){
      Serial.println( F("OK!") );}
    else{
      Serial.println( F("FAILED!") );
    }
  }
  delay(500);
}